Cake Airbrush Guide and Tutorial: Best Airbrush for Cakes and Pastries
The eye eats, as is well known.
Therefore, a beautifully designed cake, whether with fondant, marzipan flowers or cream, is equally appealing and appetizing.
Within the last few years, a new possibility has emerged in the field of baking: Airbrush for pastry and cake design.
In this guide you can find out what this is and how you can use airbrush to create beautiful cakes with food coloring.
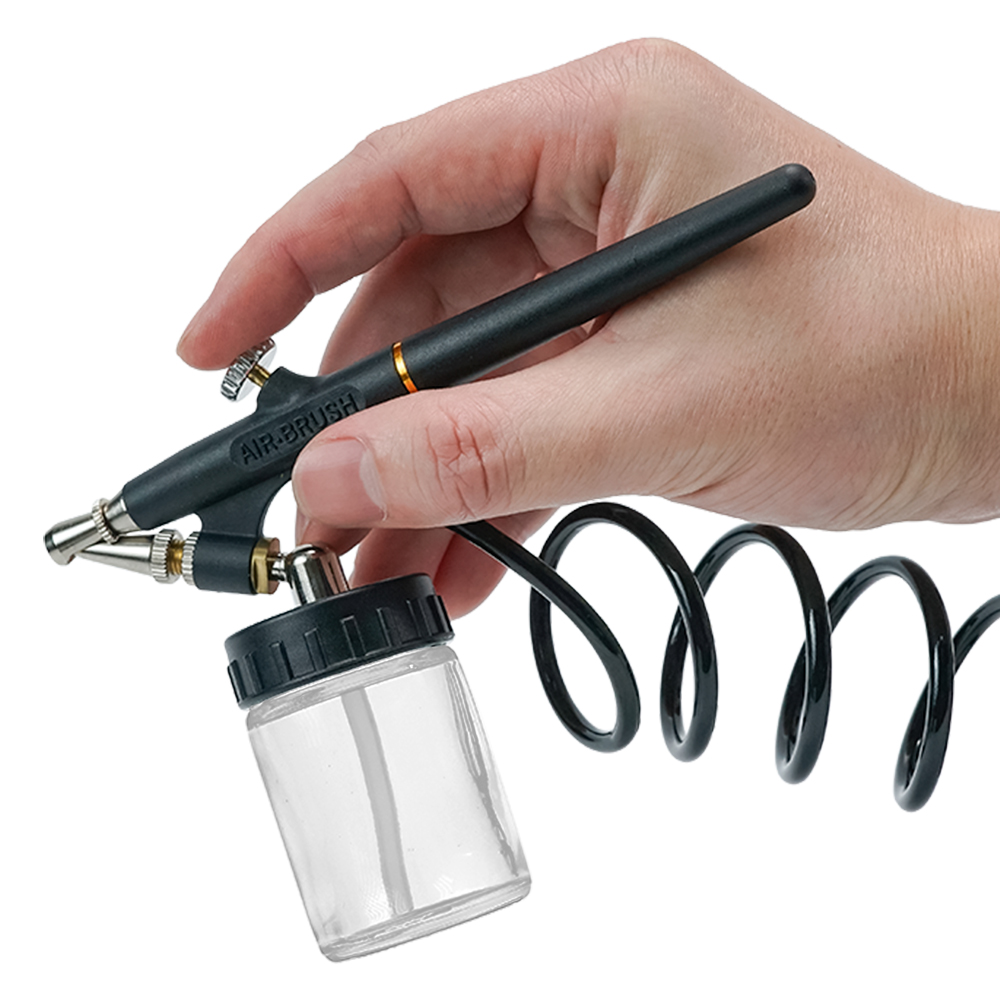
You can use an Airbrush for Cakes and Pastries
An airbrush pistol can be used in many different ways.
You can use it not only to aerografo nails, makeup , or tattoo, but also to airbrush for cakes.
With an cake airbrushing machine you can basically conjure up any art form on a cake:
- Fine Ornaments
- Different Shapes and Patterns
- Pretty Color Gradients and Shades
- Complete Images such as Landscapes or Animals
- 3D-Effects
ll kinds of substrates can be sprayed, such as fondant, marzipan, flower paste or royal icing.
However, white roll fondant is best suited for this airbrush technique.
It may sound difficult at first to decorate cakes or other pastries with an cake airbrushing machine, but it is not.
In this guide you will learn what you should pay attention to.
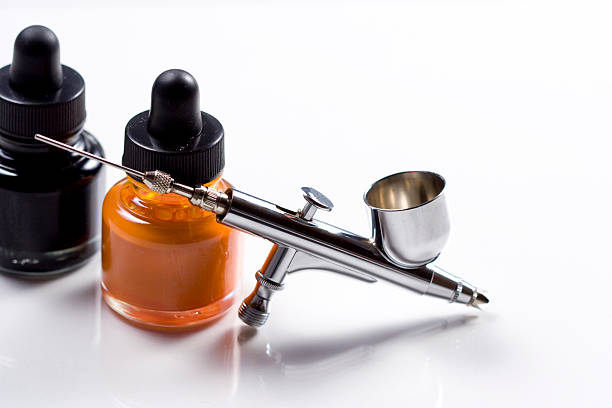
What do you need to know about Food Colors for Airbrushing?
Food coloring for airbrush cakes is characterised by some special properties.
As with all airbrush paints, the paint must not be too thick in consistency, otherwise the airbrush gun will quickly clog.
Therefore the paint should have a high pigmentation.
If the paint is too thick, you can easily thin it. In principle, food coloring in paste or powder form can also be diluted and used.
However, since especially beginners in the airbrush cannot judge whether these pigments are suitable for airbrushing, we would not recommend this.
If the paint is not suitable, the nozzle may clog.
We recommend that you only use liquid food coloring and preferably one that is designated for use in the airbrush gun.
Caution is required when using food coloring on fondant.
Fondant consists mainly of sugar and is therefore softened by liquid colors as these dissolve the sugar.
This causes the fondant to start “sweating” and may even partially dissolve.
The airbrush paint is atomized very finely so that this problem does not occur.
If you want to create more intensive colors, you can apply several layers of paint and let them dry before each new layer.
Every fondant can withstand this fine spray mist.
However, the fondant only tolerates these colors if they are not diluted too much with water. By too much water, the sugar in the fondant is nevertheless dissolved. It is therefore advisable to use special airbrush food colors. The quality of the paint used is also crucial.
Advantages of Airbrush for Decorating Pastries
- Using an airbrush for baking offers many advantages. Airbrush offers you many possibilities. With the airbrush gun you can not only create different patterns and color gradients, but you can also mix the colors to create new and unique shades. You can also do this by mixing different colored fondant or coloring with food coloring, but this requires a lot more work. With the help of a pipette you can mix the food color for airbrush very easily.
- You can make your pastry colorful and also create beautiful color transitions. When using fondant without airbrush, you either have to limit yourself to one color or the cake decoration is very laborious. With the airbrush for cakes you can create the color change much easier.
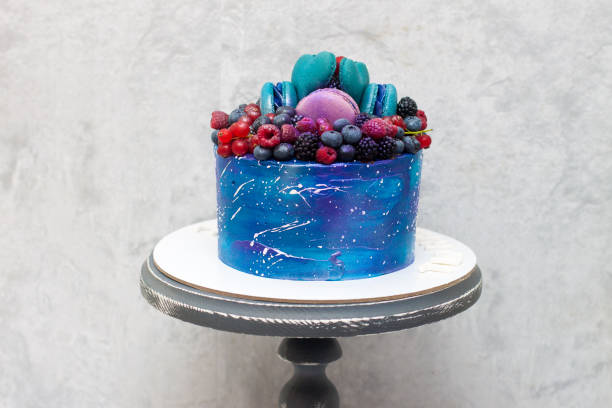
- If you want to create beautiful, unique and impressive motif cakes, airbrushing is just right for you. Using the airbrush gun allows you to create great 3D cakes. With fondant, marzipan or flower paste, such shades that can be created with an airbrush gun are impossible.
- Working with an airbrush gun is quick and easy. It is not necessary to form elaborate figures or buy expensive cake slips. With the airbrush pistol you can easily create your artwork on your cake with or without templates. So you can design every cake to suit the occasion: For example with flowers for a birthday cake for women or colorful motifs for children. And all you need is a tool and no big effort.
Step by Step Tutorial for Cake Airbrush
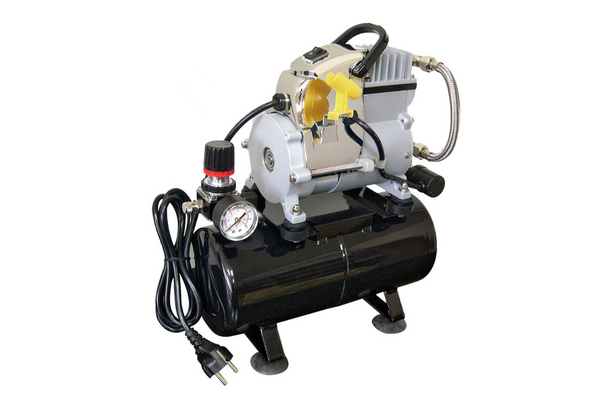
Prepare Cake Airbrushing Machine
The construction of the cake airbrush set is very simple: First you connect the supplied hose to the airbrush gun and the compressor.
Connect the compressor to the power supply.
Often the compressor of airbrush sets for cakes can be adjusted in three stages, which makes it easy for you to work.
How high you have to set the pressure depends on your desired creation.
Next, you can prepare your work surface and then fill the chosen paint into the paint container of the airbrush gun.
Be careful not to fill in too much paint.
Usually two or three drops are sufficient.
If you put too much paint in the container, you have to pour away the excess paint.
Therefore it is better to add a little paint and refill it if necessary.
Prepare work Surface
You should definitely use a revolving cake plate for your work on cakes.
If you don’t have one yet, it is definitely worth creating one, as it will make your work much easier.
You can save a lot of work by airbrushing the cake or by covering it with fondant.
An airbrush extraction system is also a sensible purchase if you plan to use the airbrush gun more often. If you don’t have an extraction system, you should protect your work area well by covering it with newspaper, for example, as a fine mist of paint is created during spraying. This will not only land on your cake, but also all around it.
You can also put your cake in a large box and spray it under the switched on extractor hood.
This has a similar effect to the extraction system.
To get a good grip on the cake, the box should be open at the front and top.
The side walls and the extractor hood will keep your working area relatively clean.
However, if you want to use the airbrush gun frequently, we recommend that you purchase an airbrush extraction system, as this will save you time when covering and cleaning the work area.

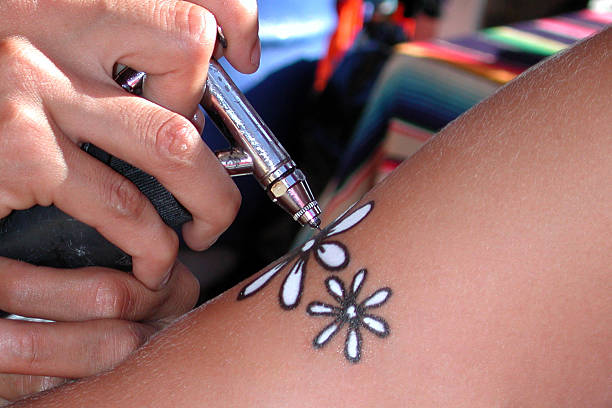
Spraying of larger Areas and fine Lines
You should not make your first spraying attempts right at the cake, but first familiarize yourself with the airbrush gun.
For this you can spray your first large areas, fine lines and color gradients on cardboard or a cake board.
The airbrush gun is easy to use, but a little practice won’t hurt.
As soon as you have developed a good feeling for the airbrush, you can dare to touch the cake and spray your first motif.
You can either use special templates or you can make your own templates from cardboard or kitchen paper.
Spray Patterns
Spraying patterns on the cake requires a steady hand and great skill.
Especially spraying fine and straight lines is not so easy.
Ornaments and larger flowers are not too difficult, even for beginners, as long as some things are taken into account.
By the way, spraying sharp edges is not possible with the airbrush gun. They will always look a little washed out. If you want to create clear, sharp edges, you have to use a stencil. You should also use stencils if you want to have difficult and detailed patterns on your cake.
Use Stencils
If you succeed, you can spray any pattern on your cake without a stencil.
However, the use of templates makes decorating your cakes much easier. They are available in all imaginable variations.
If your desired motif is not included, you can also simply make an airbrush template for your cake yourself.
Just cut it out of cardboard.
This is not as clean as with a special airbrush template for cakes, but it is definitely sufficient for the beginning.
Most airbrush stencils are already available for a few Euros.